 Winding stair from Rec. Room to Rec. Room loft after the roof had been removed.


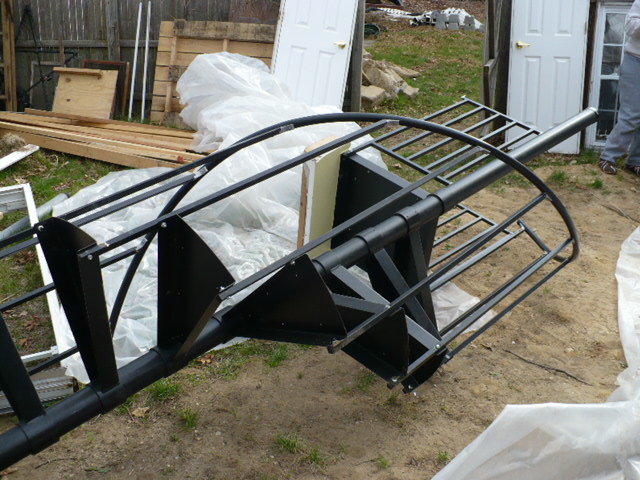

We couldn’t find a buyer so we donated the stair to the ReStore.

Winding stair from Rec. Room to Rec. Room loft after the roof had been removed.
We couldn’t find a buyer so we donated the stair to the ReStore.
“To Do” List from 3/23/12:
– inventory scrap metal
[not so much an “inventory” but a sorting of light steel, copper pipe, copper wire, and aluminum so each could be taken to the appropriate weigh station at Gershow Recycling http://www.gershow.com/ ]
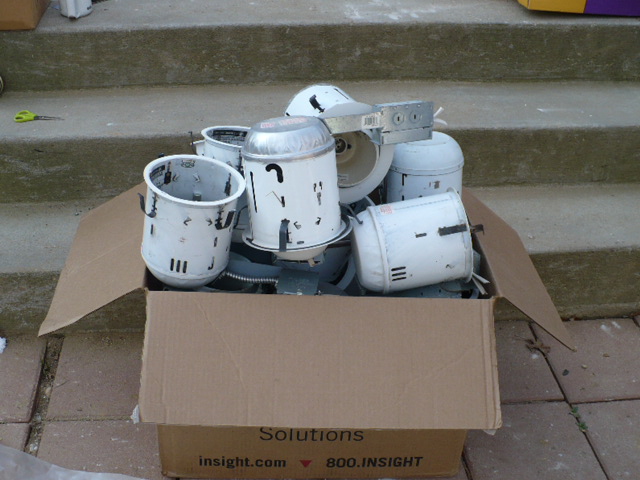
– clean & sort high-hats (remove wires)
[there were three types of high hats: ‘insulated’ (IC), ‘open’ (non-IC), and CUL (rated for damp locations); the “wires” refer to Romex (actually any non-metallic) of the circuit from which the light was cut]
– remove outside lights from bldg.
– photo & measure windows & doors being donated; send email to ReStore for pick-up approval
[Habitat for Humanity’s ReStore donation procedure for pick-up requires pics and details (dimensions) emailed to the coordinator for approval and pick-up appt. http://www.habitat.org/restores ]
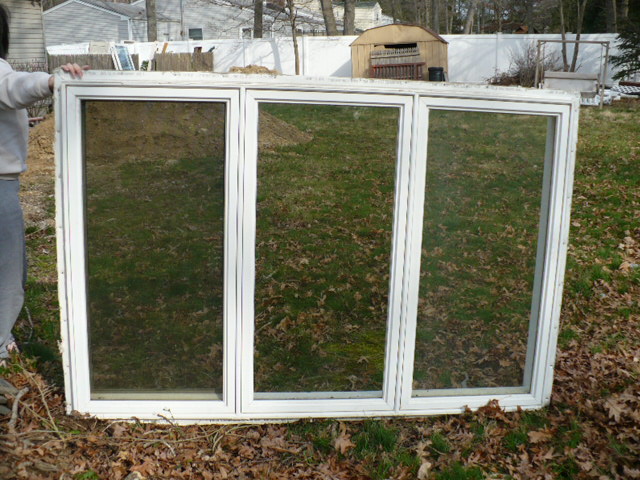

[none of the existing windows & doors were kept as they were all vinyl and the lower end stuff (ie. molded, hollow core doors)]


– clean deck lumber of nails, sort, re-stack
[during demolition I set aside particularly nice, long pieces that would be difficult to buy new and transport in a Toyota RAV4; if I could, I would have stacked nearly all the CJs and rafters; “deck” is a characterization indicating 2x8s or larger]
– wind-up & bag scrap wire
[as I removed the old electrical wire (BX & Romex) I’d toss it into a garbage can for later stripping and sorting; altogether around 8 x 35 gal. cans worth were scrapped]
– sort removed switches, lights, receptacles, etc. & box-up
[originally, I thought these would be reused or donated but, in the end, they were tossed because ‘new’ aren’t expensive and ‘used’, I learned, could be damaged and could be a hazard]
– assemble carport & tarp for additional storage of window delivery
[we placed the window orders before knowing about the delay from the additional footings and the subsequent rescheduling of the demolition; we didn’t think we’d have a ‘safe’ room before delivery so were going to put them in a temp carport]
– drop PC ceiling & clean-up debris
[“drop”= standing on the ceiling joists (CJs) and using a push-broom to knock the ceiling drywall down (it’s a thrill to do); “PC” = the bedroom we used as a home office where the computer was kept (later to be the kitchen)]
– remove carpeting from bedroom & drop ceiling
– remove rec. room drywall
– remove bathroom vanity

– remove drywall in basement along all plumbing & electrical runs
[the following pics taken from same direction]


– remove exterior siding from PC room wall that’s being removed
– tarp & plastic in prep. of weekend rain
[rain was expected and there were a lot of materials in the yard to cover; I also wanted to tarp things “inside” just in case the house tarp leaked…which it did]
– clear basement of wood so water can be swept to drain
[I don’t remember what wood was in the basement; maybe it was the base molding, from all the rooms, we would be replacing (it was finger-jointed pine painted white)]
The Official Website of Meg LaTorre
Portfolio
An arty, thrift-loving, bookworm cat lady.
Travels and musings of a bohemian gypsy
A listener supported, non-commercial, low power FM radio station in Jamestown, NY.
adventures in the world of genealogy
The Official Blog of Geocaching
Updates from the GovTrack.us team. Analysis of legislation is posted at https://govtrackinsider.com/.
what we've been up to at the whole damn house :
A renovation gone wrong
Modern life in our 1889 Victorian home
Digital and Analog Modelmaking
A DIY guide to saving our world while building a happy, healthy and wealthy life
Just another WordPress.com site
...supporting our hobby!
Comics and gaming stores in Regina, Saskatchewan and Medicine Hat, Alberta
From our 'lil Austin bungalow
A story of home renovation
Making the unloved lovable.
An Adventure in Restoration
Preparing For The Centennial Of A Place That Matters
extraordinary happenings in an ordinary house
living the reno life on our historic garden block
Renovating an old house by a musical couple who want to live there the rest of their lives.
a DIY work in progress
Random observations and unsolicited advice
The trials and tribulations of renovating an Edwardian terrace
The "Nightmare on Elm Street" Stage
Decorating Solutions for the Dollar Challenged
a harrowing journey of home improvement & garden renovation
